
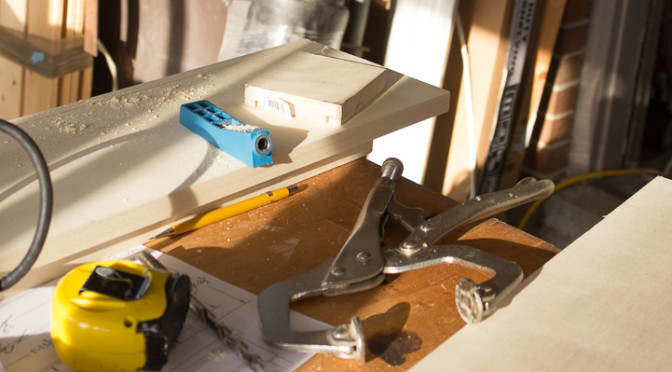
One of the quickest ways to build “stuff”, is to use a pocket hole jig. Basically, the jig drills a screw hole at an angle into a board. This lets you put a screw through the center of one board into another. No dowels, no tenons, no dovetails, no fancy tools! It may not be a family heirloom, but most of the things you can assemble with pocket screws will hold up to a lot of abuse.
The Jig
The Kreg Pocket Hole Jig series is the most popular, but there are several others brands available, as well as plans for making one yourself. If you are going to use pocket holes for several projects, I suggest the R3. It has two holes, and you can quickly adjust it for board thicknesses. For the rest of us, the Mini will do everything the R3 does, but its a little more work to set up (instructions below!).
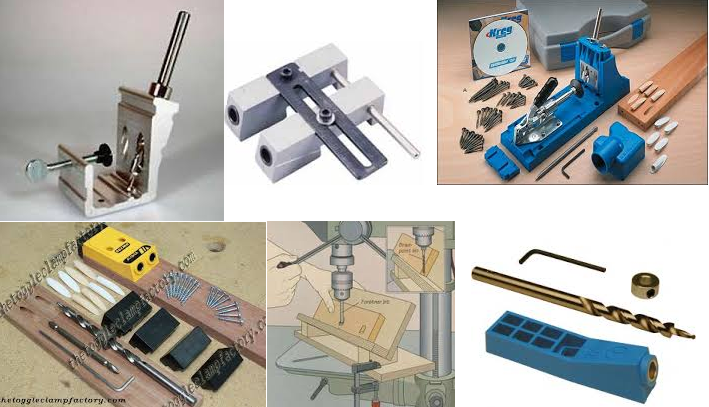
I’m going to focus on the Kreg Mini Jig, since its easy to find and is inexpensive ($20 vs. $40 for the R3). With this kit you get a single hole jig, a drill bit and a stop collar.

The Drill Bit
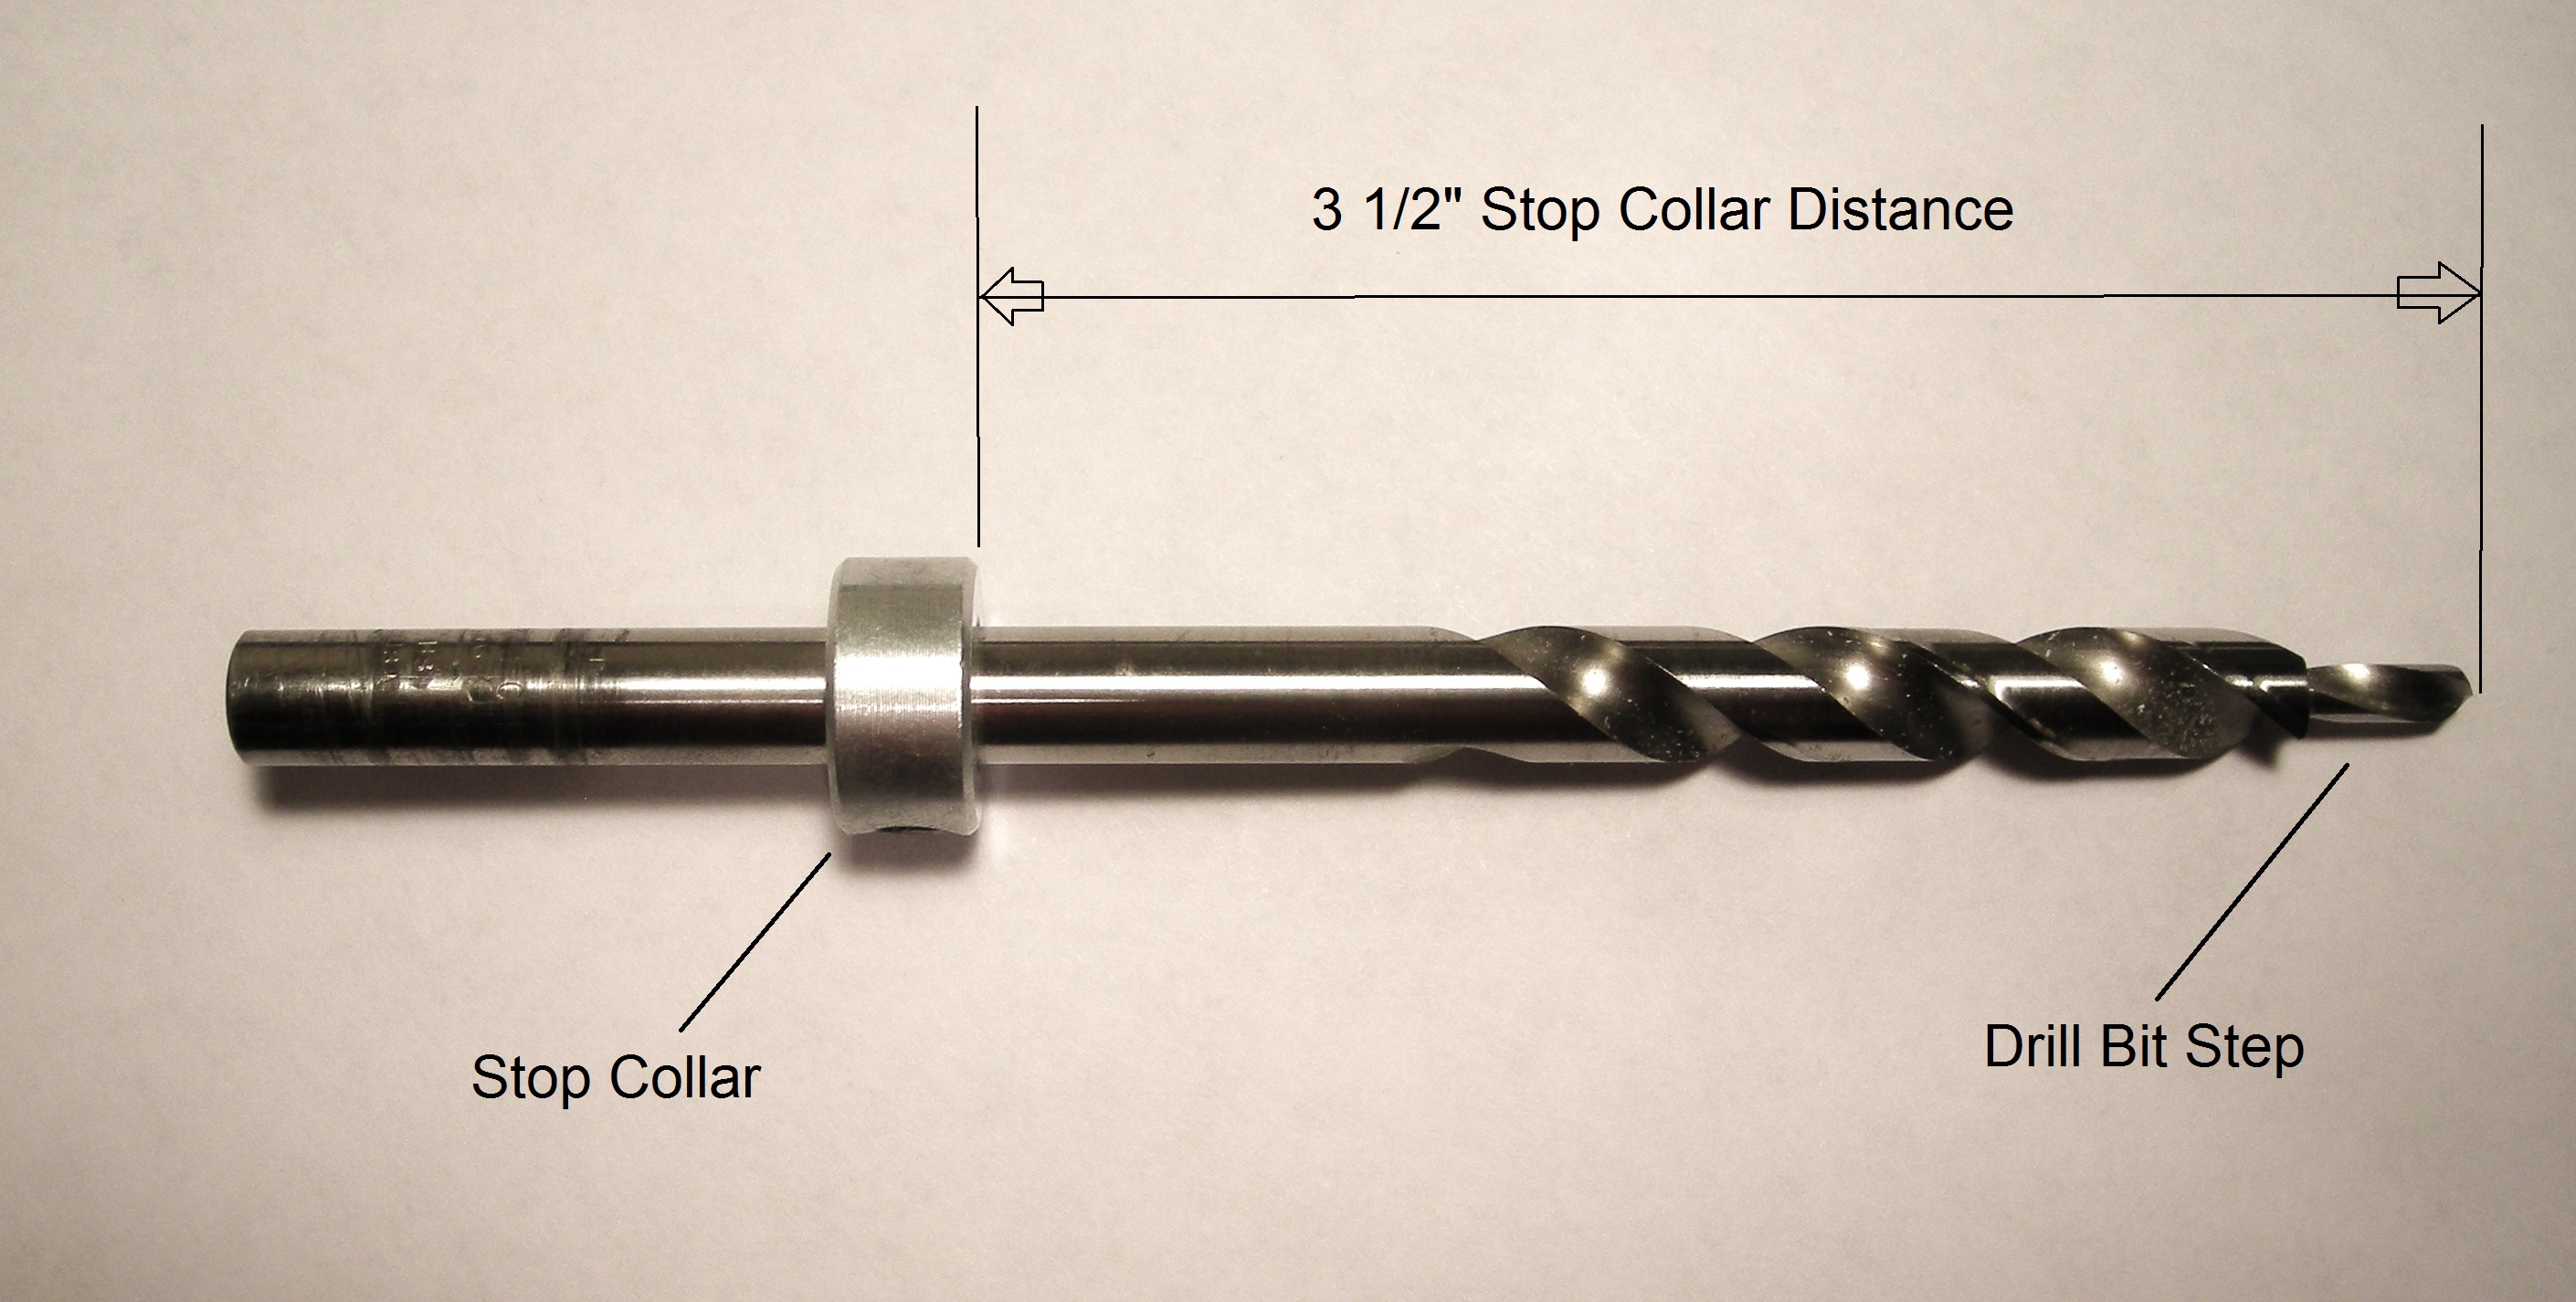
The drill bit is a special stepped drill. The main body of the bit is 3/8″ and it has a smaller bit on the end for a countersink, about a 1/2″ long. There are two styles available, the one you want (and is in the kit) has a flat step between the two drill shanks. This is the surface the screw head will rest on.
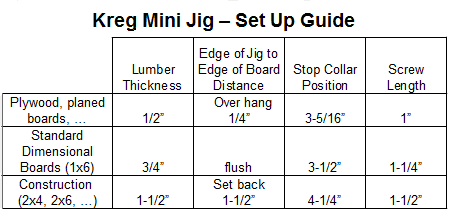
You also need a stop collar. The collar is used to set how deep the drill bit can plunge into the board. It also means the holes will all the the same depth. The table below shows where to place the stop collar, depending on how thick your board is.
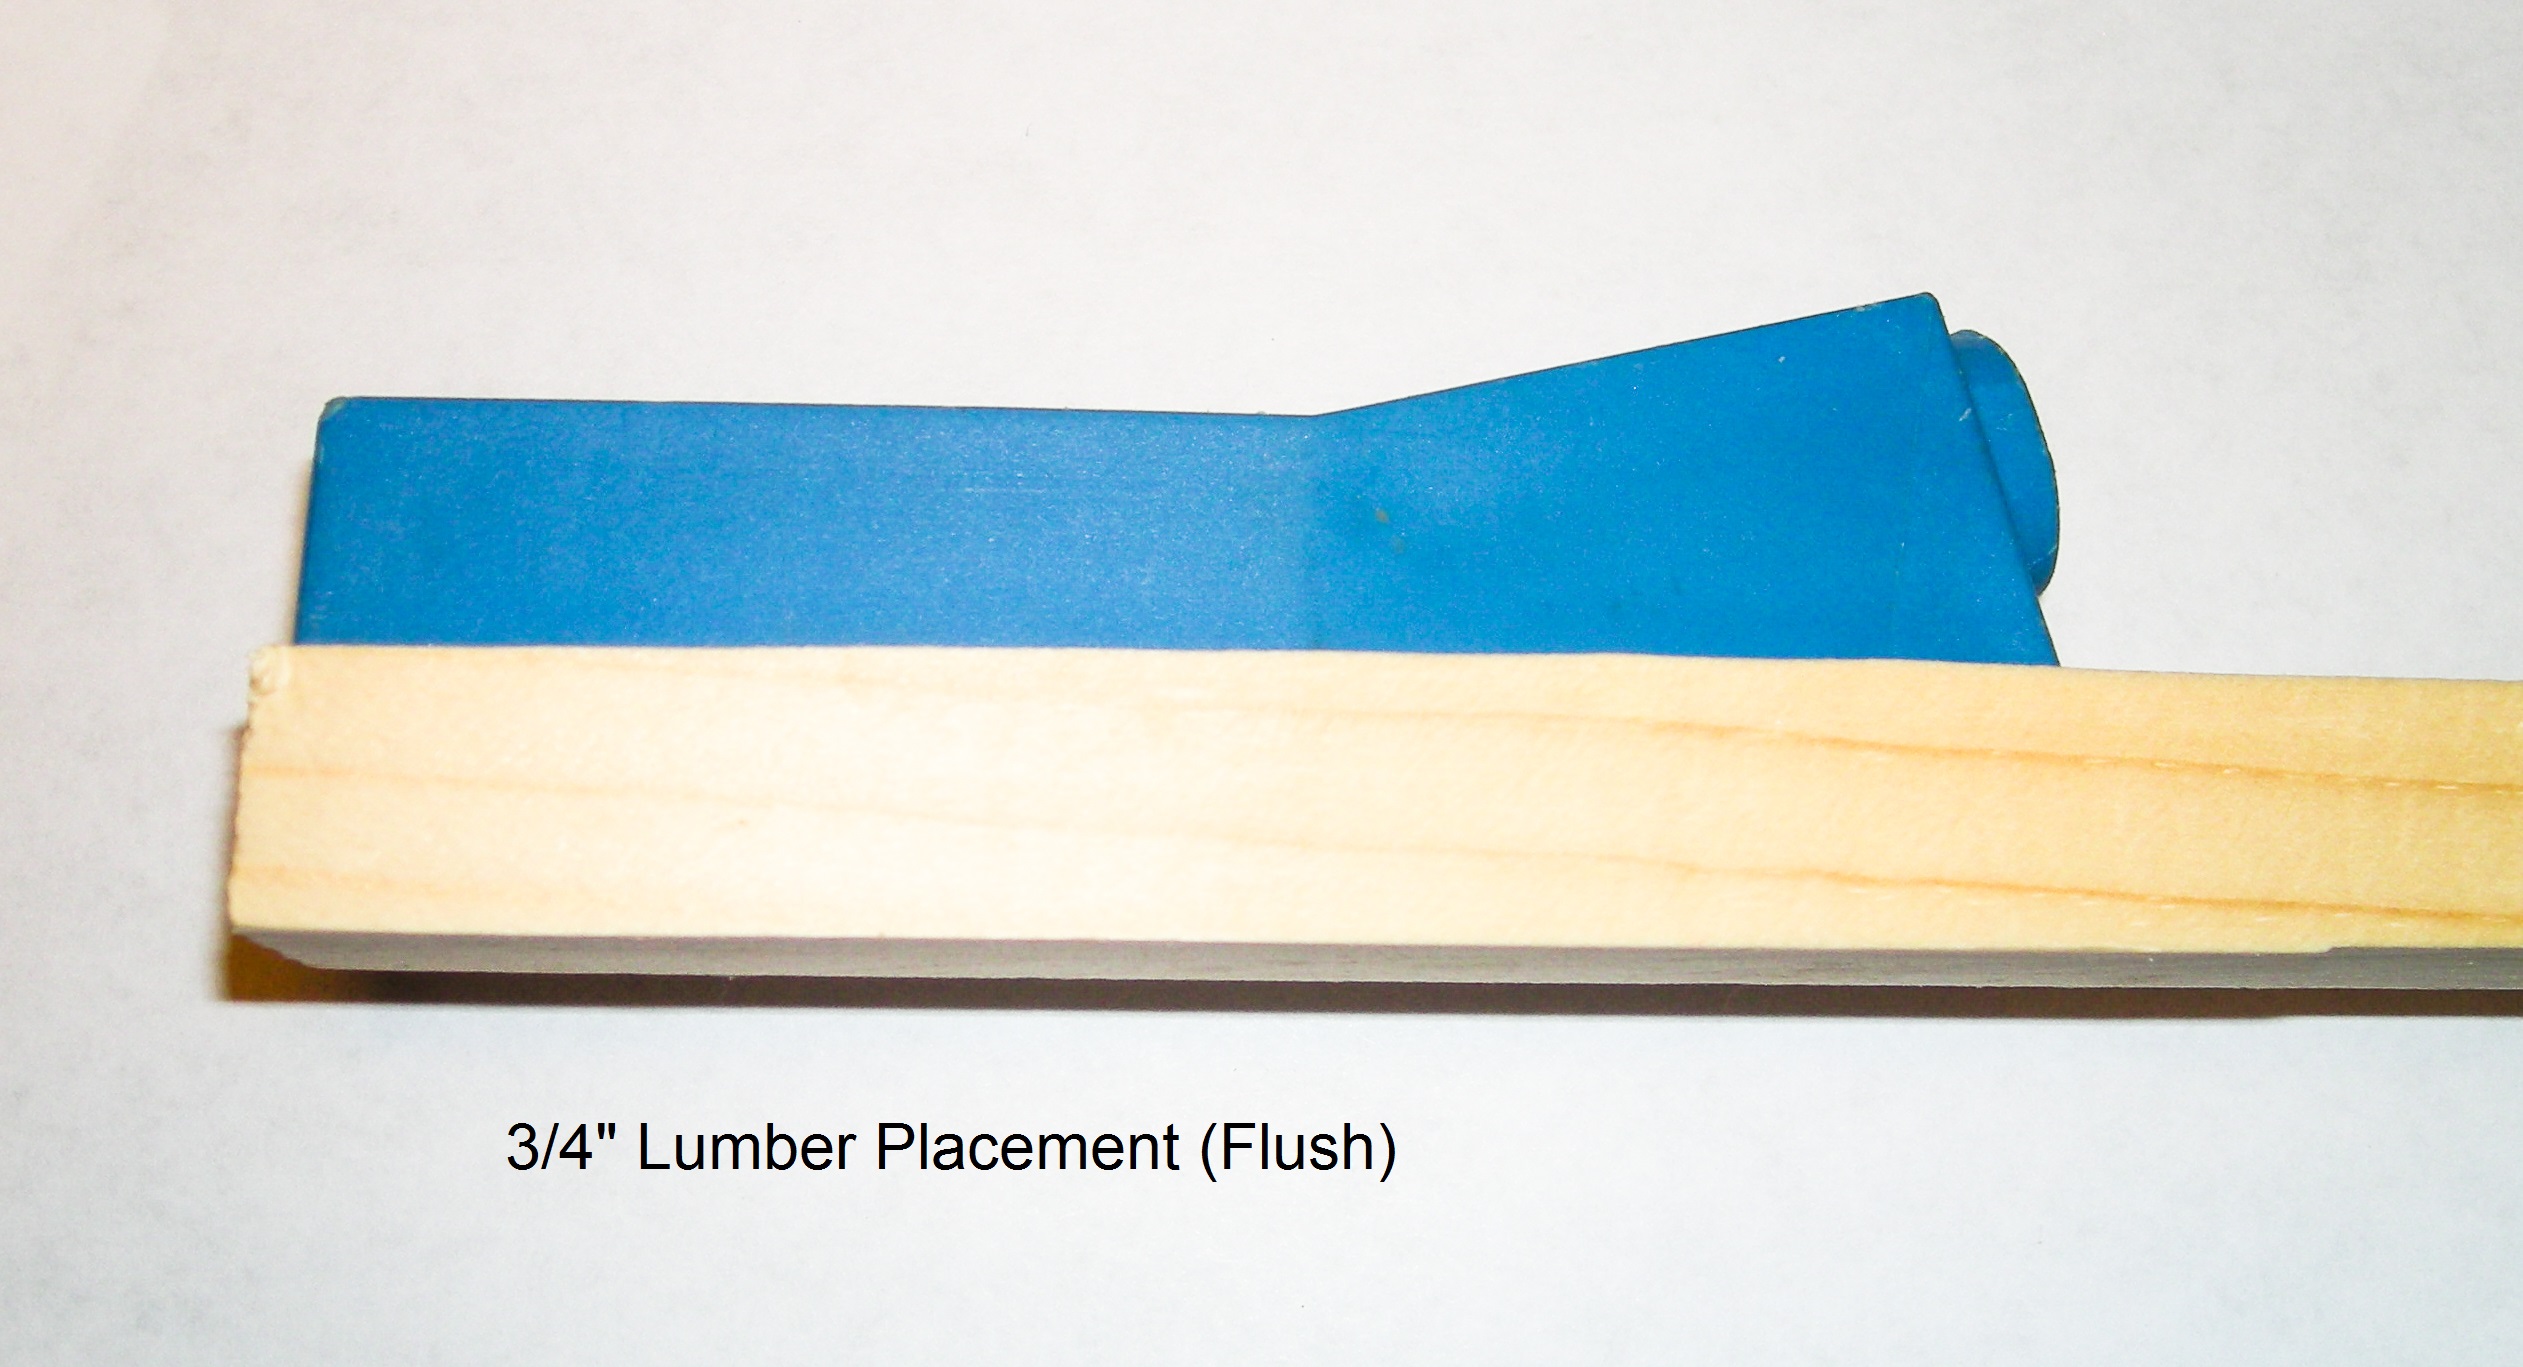
The Set Up
The table, above, gives the dimensions for where to place the jig. See the photos below for examples.
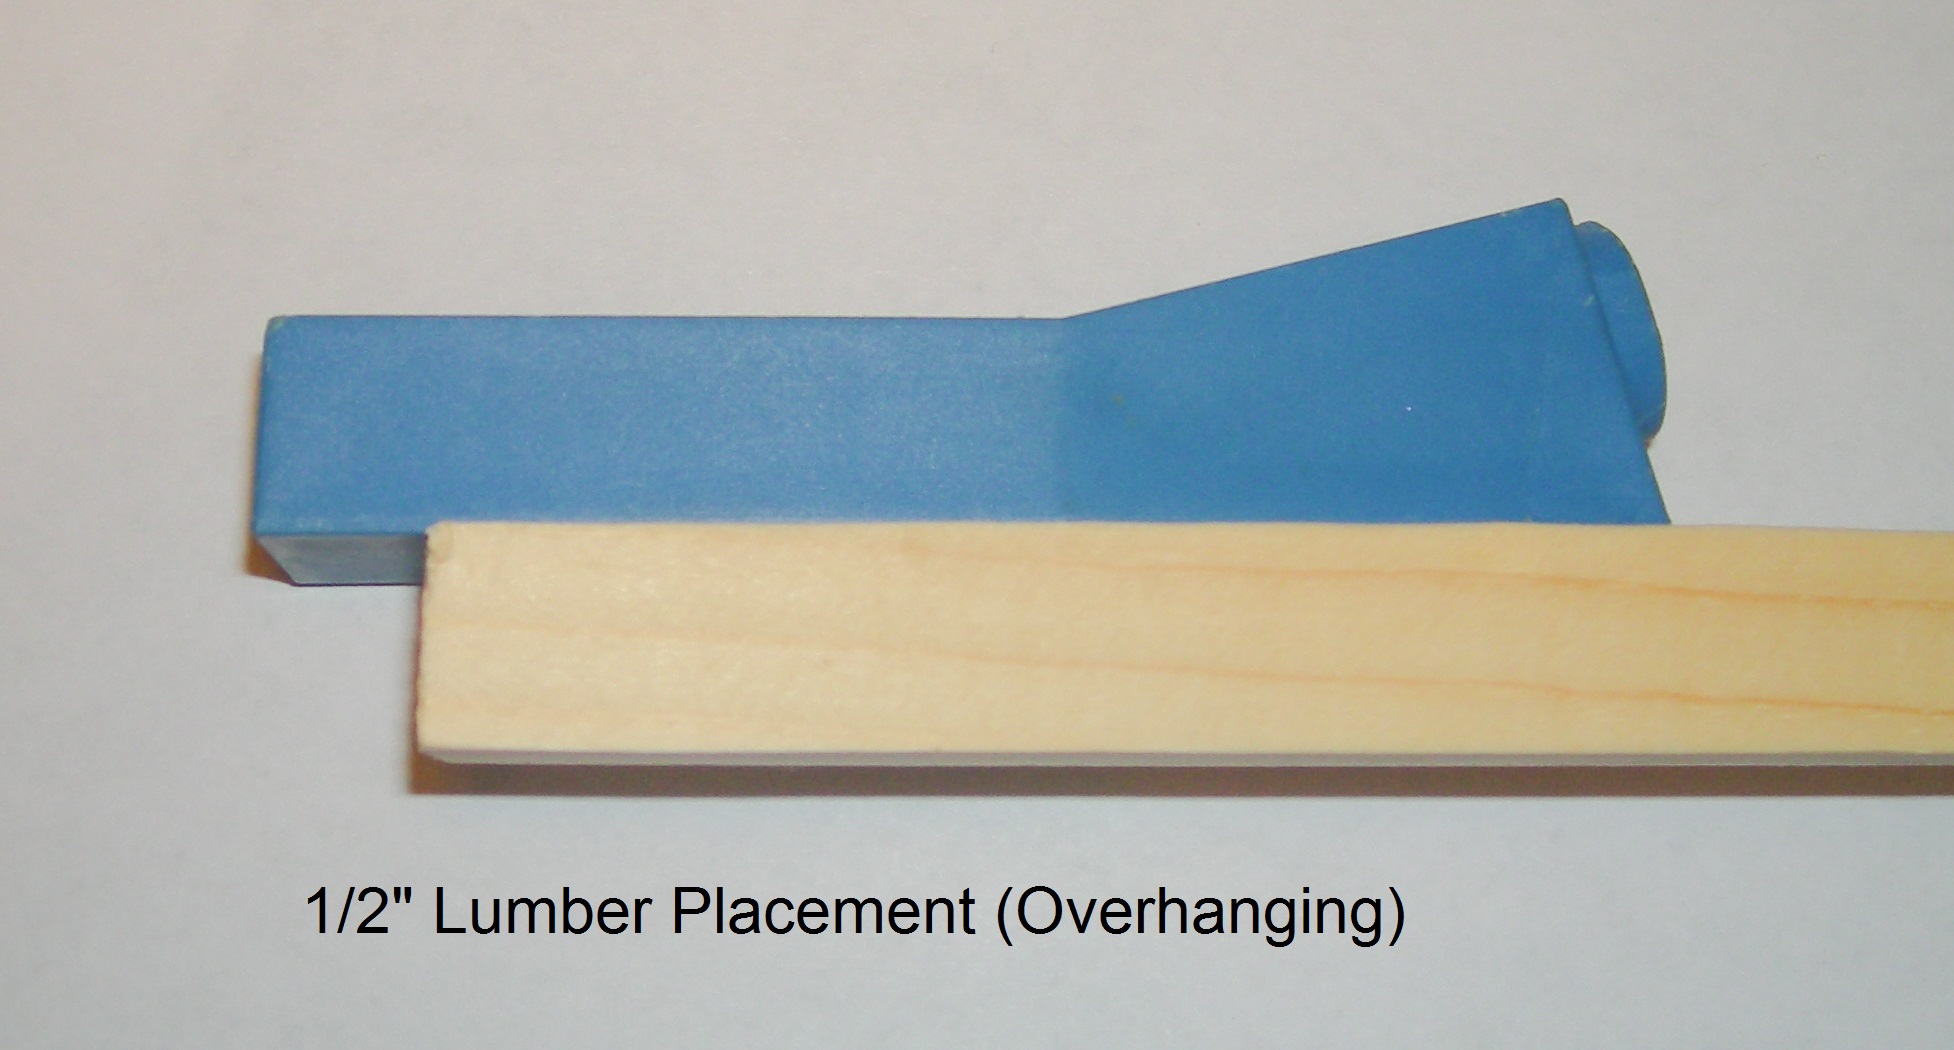
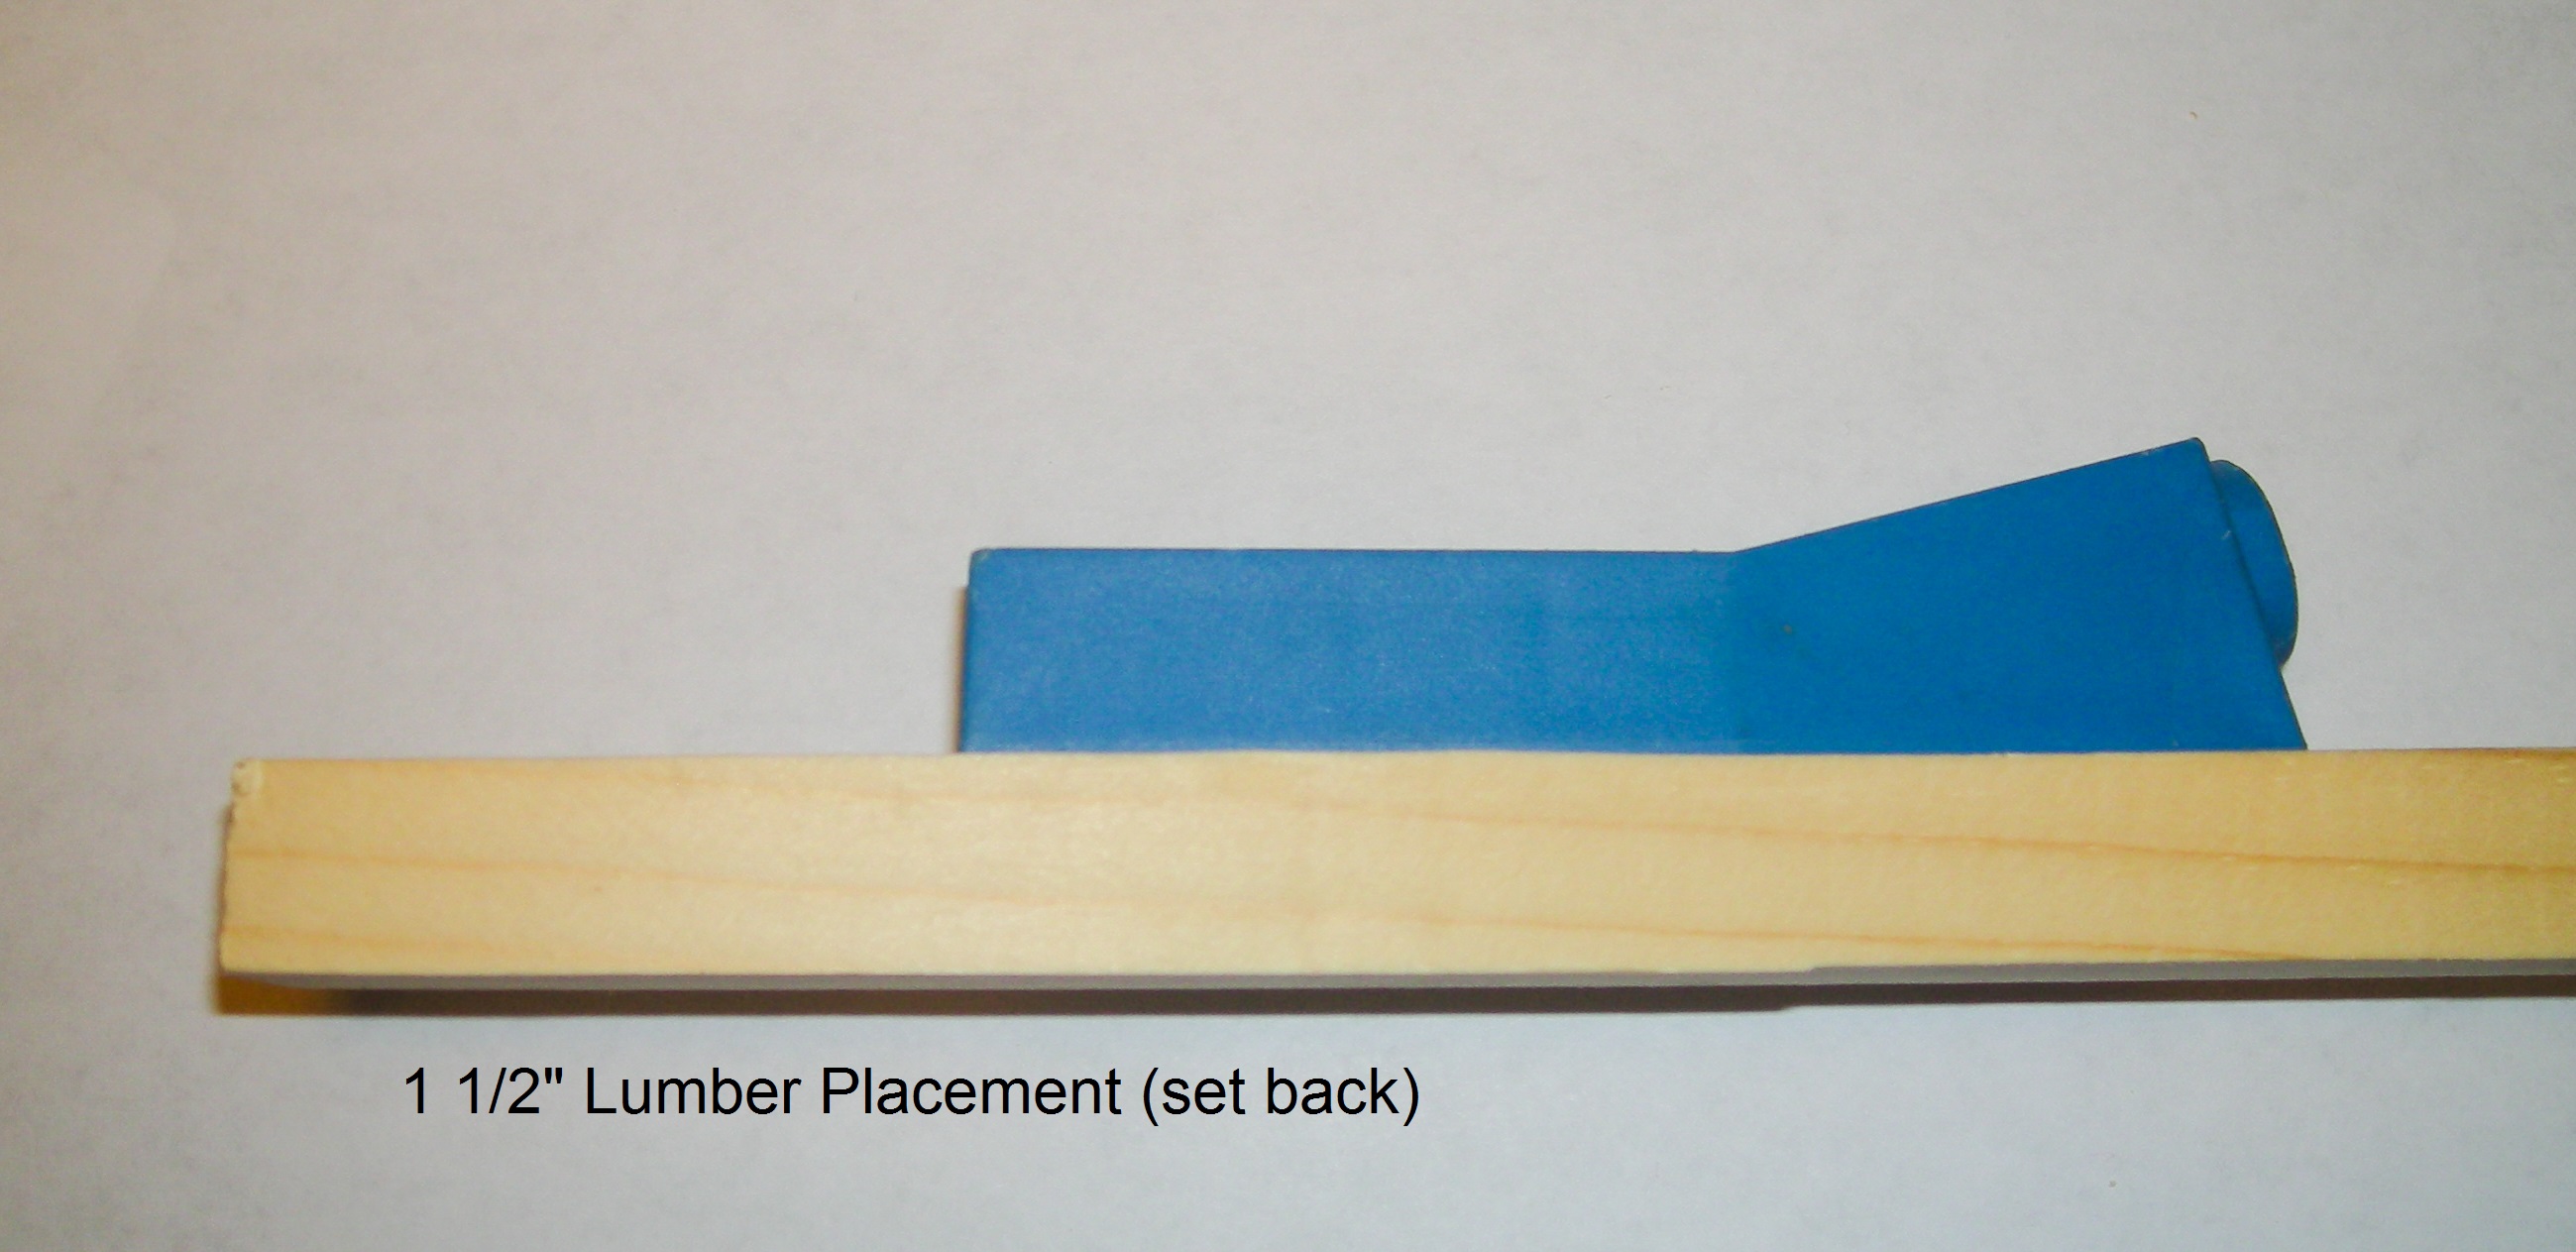
When I use the Mini on the 1/2″ or for 2×4’s (1 1/2″), I make a spacer so I don’t have to measure everything. The goal is to have your screw poke through in the middle of the board. the bit should stop 1/8″ or less, from poking through, to avoid splintering the board. If you think you might have trouble with these adjustments, buy the R3.
Make a Strong Joint
Which piece you drill for pocket screws does matter. Whenever possible, you want to screw into the side of the grain (cross grain). This is a much stronger joint than drilling into the end grain of a board.
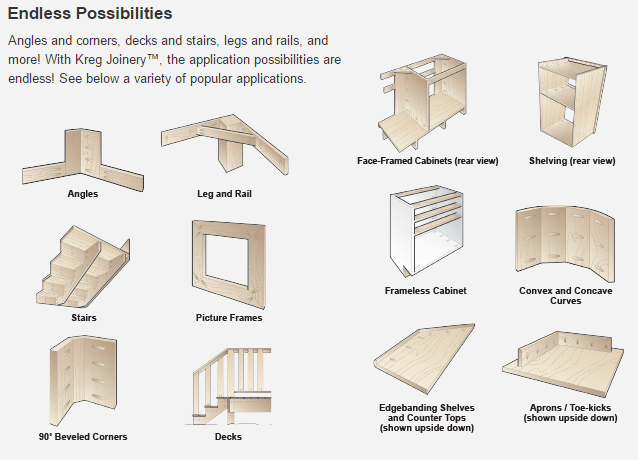
You can see in the diagrams below (from Kreg’s website), that there are many ways to use these jigs. Frames, panels, cabinets and boxes can all be made using pocket screws.
Instructions
1. Decide how many pockets you will drill. Lay them out and mark them on the boards.
2. Clamp the jig in place. If your boards are 3/4″ or “one by”, place the jig flush with the edge of your board (see table above for other thicknesses). Any bar clamp or a larger C clamp should work fine for holding the jig.
3. Make sure the stop collar is in the correct position for you board thickness (3-1/2″ for this example).
4. Drill the hole.
5. Repeat as needed.
Once all holes are drilled
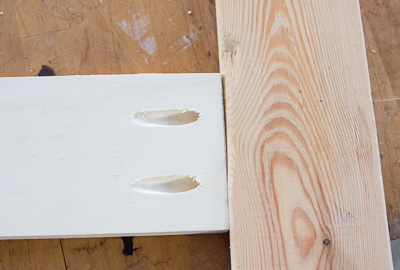
6. I like to glue my joints as well as screw them, so now is the time to add glue.
7. Align and clamp the boards and drive the screws home. You don’t need to keep the boards from moving, just clamp them to keep the edges flush.
Screws
There are a couple of choices in screws. The table above gives you the lengths recommended, by board thickness. You also need to consider the type of wood you are screwing into. For hardwoods (ash, oak, maple, walnut, …) use the fine threaded screws to reduce your risk of splitting the material. For soft woods (pine, cedar, basswood, plywood, melamine, particle board), use the coarse threaded screws as they will bite and hold better.
Wrap Up
I’ve used pocket screws to build side tables, picture frames, boxes, drawers, and a lot of other stuff. It is quick to use and easy to get right. I hope this helps you to get started.
NOTE: No one has paid me for this. I purchased this jig with my own money, for my own use.
Leave a comment and let me know if this helps, or if you have questions. I look forward to hearing about your projects and successes.
Dan
[contact-form][contact-field label=’Name’ type=’name’ required=’1’/][contact-field label=’Email’ type=’email’ required=’1’/][contact-field label=’Website’ type=’url’/][contact-field label=’Comment’ type=’textarea’ required=’1’/][/contact-form]
Perfectly written articles, Really enjoyed reading through.
Thanks,great simple guide!
Gary
wow, awesome article.Much thanks again. Want more.
I have not checked in here for a while as I thought it was getting boring, but the last few posts are good quality so I guess I will add you back to my everyday bloglist. You deserve it my friend 🙂
I appreciate this well written instruction as I am using the jig for the first time. I am making a wood headboard that I designed and want to use this method of attaching the rails for the clean look. Thank you for the insight!
I am so glad that you enjoyed the article on the Kreg Jig. I hope you will post the headboard when you are done.
I have been in Google all morning looking at articles and videos on the best way to use my new pocket jig kit and this one was by far the best and most helpful. Thank you for posting.
Thank you! That’s very nice to hear!
Wonderful article! I found so many new things and information while reading your post. I just want to give a thumbs up for your great article. Thanks for sharing. keep it up.
Thank you!