
 There are several ways to build a drawer for a desk, a dresser, or your kitchen cabinets. And while the traditional dovetail is a “hallmark” of a well built piece of furniture, the truth is, they require time, experience and tools that the average person doesn’t have. For someone starting out in DIY, there has to be a simpler (cheaper) way to get the job done!
Guess what, there is… Pocket Holes – In fact all you need for tools is a saw and a pocket hole jig!
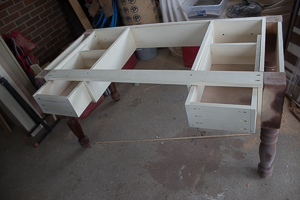
The Box
A drawer is just a box after all, but it has to take pressure and loads that a jewelry box, or a kitchen cabinet box would not. Dovetail, box joint and lock joints are all designed to spread that load, and maximize glue surface. Pocket screws may not take the same loads, but they will be more than sufficient for most applications.
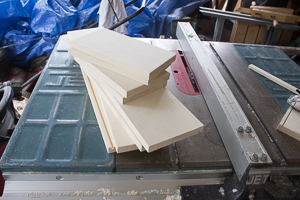
To build our box, we need two sides, front and back panels and a bottom. In our example, I am going to hide the pocket screws behind a false front and the back of the drawer. Because we are using a false front, we will make the sides the actual length of the drawer (minus the front panel thickness). The front and back panels are the opening width minus the thickness of the two sides.
I am using a 1/4″ plywood panel for the bottom of the box. I have two choices in how to mount it. If were using bottom mount drawer slides, I could just tack the panel to the bottom of the box, and use the glides to hold it together and carry the load. This is an option if you don’t have a way to add a groove for the bottom panel, in the sides of the drawer. This is a common method with a lot of ready to assemble furniture (Ikea).
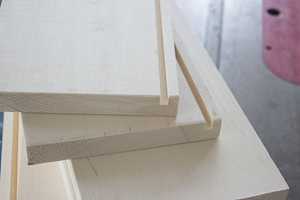
I’ve chosen to be a little more traditional, since I have a table saw, and put the bottom in a set of grooves. The back will be cut shorter, so it rests on the bottom panel. I will put a loose fitting screw into the back to keep the panel in place and let the drawer “move” (See my post on wood movement).
I cut the grooves on the table saw in three passes. I placed the fence about 1/4 from the blade, and set the blade depth to 1/4″ as well. After cutting the groove in the fronts and sides, I moved the fence over slightly and made another pass, and then again. Test fit the panel to the grooves, and we are good to go.
I then raised the blade and cut the backs down. (Actually, I moved the fence out so the small cut off piece would not be trapped against the fence (risking it being thrown back at you).
Making Holes
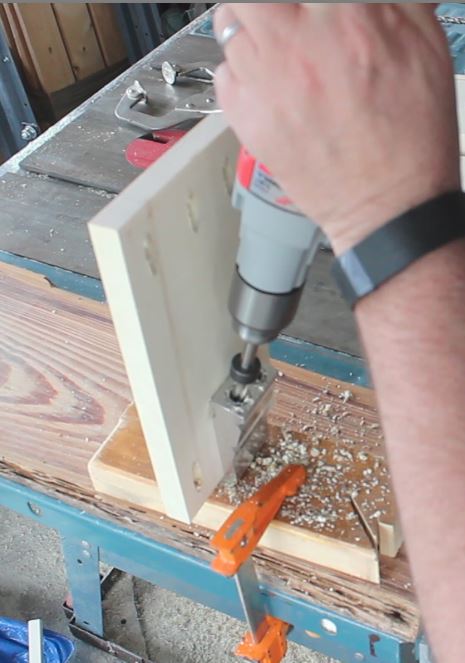
In recent a post, we presented the Kreg Mini Jig, and while it is very versatile, I am going to present an alternative, the General Tools EZ Pro Pocket Hole Jig (I have not been paid for recommendations I make, I bought both of these tools for myself, years ago). While it is large enough to use on 2×4’s, it is designed for 3/4″ lumber (guess what I’m using).
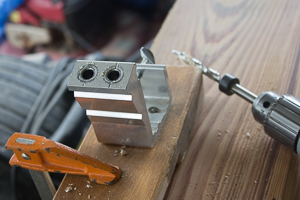
Why do I like this jig? I can clamp it to my bench, and drill a series of holes faster than the Kreg. However, the Kreg can do more, because it can be set up for different thicknesses of lumber.
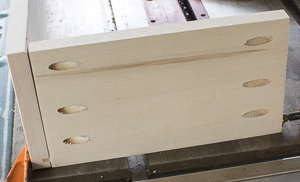
Because my drawer is deep, I’m drilling 3 holes in each end of the back and the front panels.
Assembly
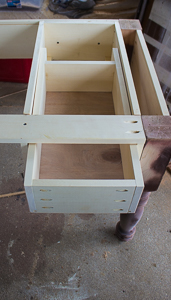
Now I have my pieces all prepped, it’s time to assemble the boxes. I like to clamp everything in place and then drive the screws. This helps to keep everything aligned. Start with the front panel. Then slide the bottom in and use it to help align the back panel. In the photo you can see my pocket square that I used to make sure the back was not tilted.
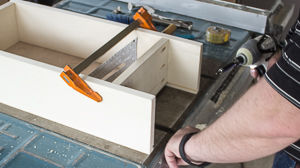
I made the sides extra long, so that they could help support the drawer when it is pulled out most of the way.
 The last step is to add a screw to hold the bottom to the back. drill the hole oversize, so everything can move with humidity changes.
There you go, a drawer that almost anyone can build in short order.
I hope this helps. What do you think? Let me know and please subscribe for my newsletter.
Links to related posts
- Beginners Guide: The Kreg Pocket Hole Jig – The Mini
- Get a Grit on Sand Paper
- How to Build a Table From a Reclaimed Column
I think I could do this! Wow 😳